
« Jack of Spades | Home | PULSE 2006 recap »
Drill & Drain
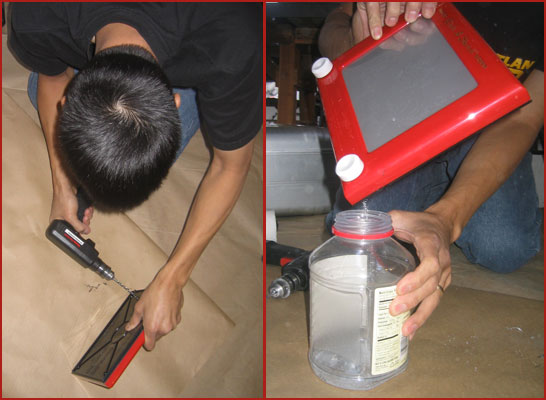
I finally have a photo of me drilling and draining an Etch-a-Sketch, so here's a more detailed description of how I make my permanent Etch-a-Sketches.
After gently tipping and shaking the Etch-a-Sketch so that most of the powder is on one side, I drill a hole on the opposite side near the post for the knob. The majority of the draining is done through this hole, with a lot of tapping and gentle shaking so as not to erase the drawing. After I'm satisfied that most of the powder is out, I drill a hole next to the other knob as well and tap some more.
I generally then give it a few really good shakes to get everything out and make sure none of the little plastic beads are left inside. Then I flip it over and see if any of the lines need to be redrawn and add any finishing touches to the drawing.
Finally, the glue: I put glue in the holes, wait for it to dry, and then check the knobs. Sometimes it doesn't take the first time and I have to add more (or drill another hole). Once the knobs are set, then I use Gorilla Glue which expands and seals the holes, add a picture hanger on the back, and clean up all the excess powder from the frame with a soapy sponge.
Occasionally, I've also drilled and drained a blank Etch-a-Sketch, before I do the drawing, and then I'm able to drain it without having to be as careful. The disadvantage is that I only get one shot to do the drawing; if I make a mistake, there's no way to erase it!
There you are: the secret to my Etch-a-Sketches. Now you can go home and try it for yourself!
October 08, 2006
Comments
I truly admire your talent.
Good luck to you and yours in Kansas!!!
JR
Posted by: JR at July 8, 2007 07:43 PM

